Restoring Files and Folders
You can recover specific files and folders on Windows or Linux virtual machines that are being protected by Zerto. You can recover the files and folders from a short-term restore point of time specified in the Journal, or from a Extended Journal Copy Repository (the latter will be performed from the Recovery site only). For more information, see Enabling Extended Journal Copy for the VPGs.
Note: Extended Journal Copy is not available in the ZVM Appliance.
Restore options are:
|
•
|
Download files and folders on your local site |
|
•
|
Restore files and folder to their original location on the production VM. |
Prerequisites
|
•
|
Restoring files and folders to original location
|
|
•
|
VMware Tools must be installed and running. |
|
•
|
Both Recovery and Protected sites must run Zerto v8.5 or higher. |
|
•
|
The Protected site must be vCenter. |
|
•
|
The user running the Restore File operation must be assigned an Alias in Guest Services Credentials. The Alias must be an Active Directory user, which has the following permissions: Modify, Read & Execute and Write. |
|
•
|
Create the credentials to access the protected VM (Setup > Guest Services Credentials > Add. |
|
•
|
File-level restore from Repository is available only with a Zerto license that includes Extended Journal Copy. |
Considerations and Limitations
|
•
|
Restore to original location is an agentless solution and is based on VMware Tools. As such, the upload rate is limited, therefore the restores for large amounts of data might be lengthened. |
|
•
|
To restore a file to original location, the Protected VM must be powered on. |
|
•
|
You cannot run multiple restore operations in parallel on the same VM. |
|
•
|
You cannot recover files or folders from a VM while any of the following operations are running on a VPG that contains the VM: Failover Test, Failover Live, Move,
Clone, or process related to Extended Journal Copy. |
|
•
|
You cannot recover files or folders from the Zerto plugin.
|
|
•
|
For file and folder recovery considerations or known issues, see the relevant Release Notes . |
|
•
|
OS and file system considerations:
|
|
•
|
For Windows VMs, you can only restore to NTFS. |
|
•
|
Zerto’s Restore Files/Folders to the production VM is not supported when the protected VM is running Windows Server 2008. |
|
•
|
If the protected VM is running Windows 8.1 / Windows Server 2012 / Windows Server 2012 R2, first install KB2999226 before using this feature. |
|
•
|
Only files and folders in file systems that are mounted under root in Linux VM can be restored. |
Before you begin
If you want to restore the files/folders to their original location on the production site, before you proceed make sure you create credentials with which you will access the protected VM.
|
•
|
These credentials should have the following permissions on all paths to which the user wants to restore the file/s: |
To restore files and folders to the Production site:
|
1.
|
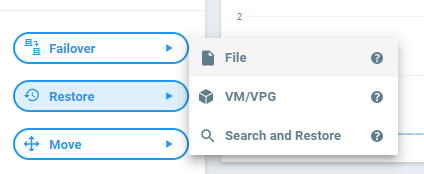
From either the protected or recovery site, select Restore > File. |
|
2.
|
The File and Folder Restore wizard is displayed. It shows VMs to be restored. |
Note: Folders and files from VMs that have been deleted cannot be restored back to the Production VM, as these do not exist. Deleted VMs are marked with the  icon.
icon.
The list of all protected virtual machines is displayed.
You can only recover files or folders from one virtual machine at a time.
A virtual machine for which the VPG assignment has changed appears in the list with all its VPGs' attribution.
|
3.
|
Select the virtual machine on which the file or folder is located and click Next. |
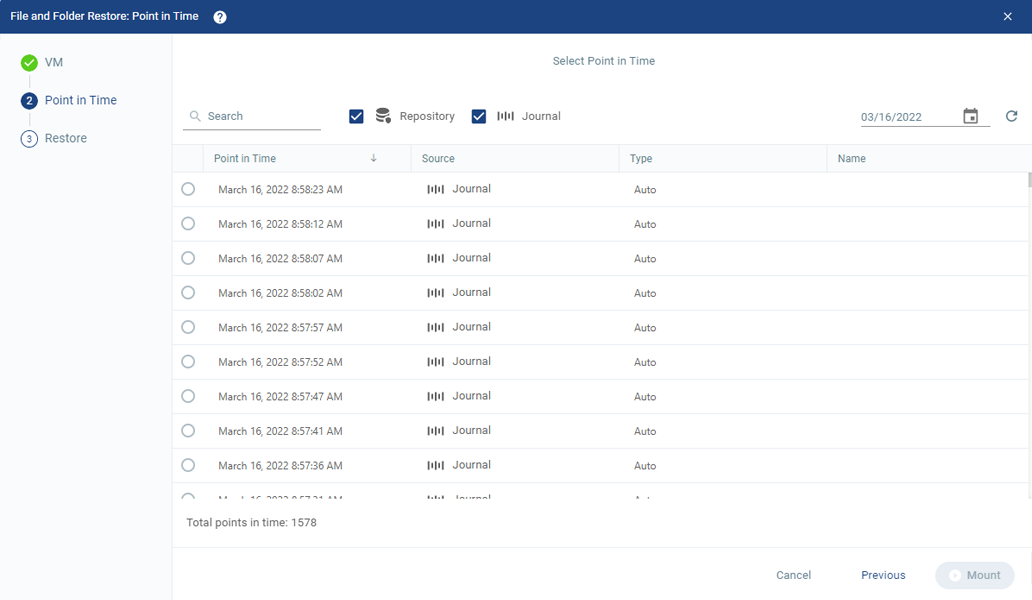
The Point in Time step is displayed. By default, all Points in Time are displayed.
|
4.
|
Select the point in time from which to recover the file or folder. |
You can use the Source option to select the origin of the point of time you wish to display, as follows:
|
•
|
Journal: Displays restorable points in time written in the Journal. These points in time are retained in the Journal until the specified Journal history size is reached. |
|
•
|
Repository: Displays points in time as determined by the VPG Retention policy. This option is available only after you have associated a Repository with the virtual protection group (VPG) containing the virtual machine. This option is available only with a Zerto license that includes Repository support. For more information, see Enabling Extended Journal Copy for the VPGs. |
By default, both options are selected. Points of time that exist both in the Journal and the Repository are displayed twice.
The Type column indicates one of the following:
|
•
|
Auto: Points in time generated by the Zerto Virtual Manager. |
|
•
|
App-aware: Application-aware points in time that were taken in conjunction with the VSS agent, so there were no pending I/Os or data in memory. Once the point in time is taken, the application resumes immediately. |
The mount task starts. Mounting enables access to the selected point in time.
When mounting is complete, the files and folders for restore are available for browsing.
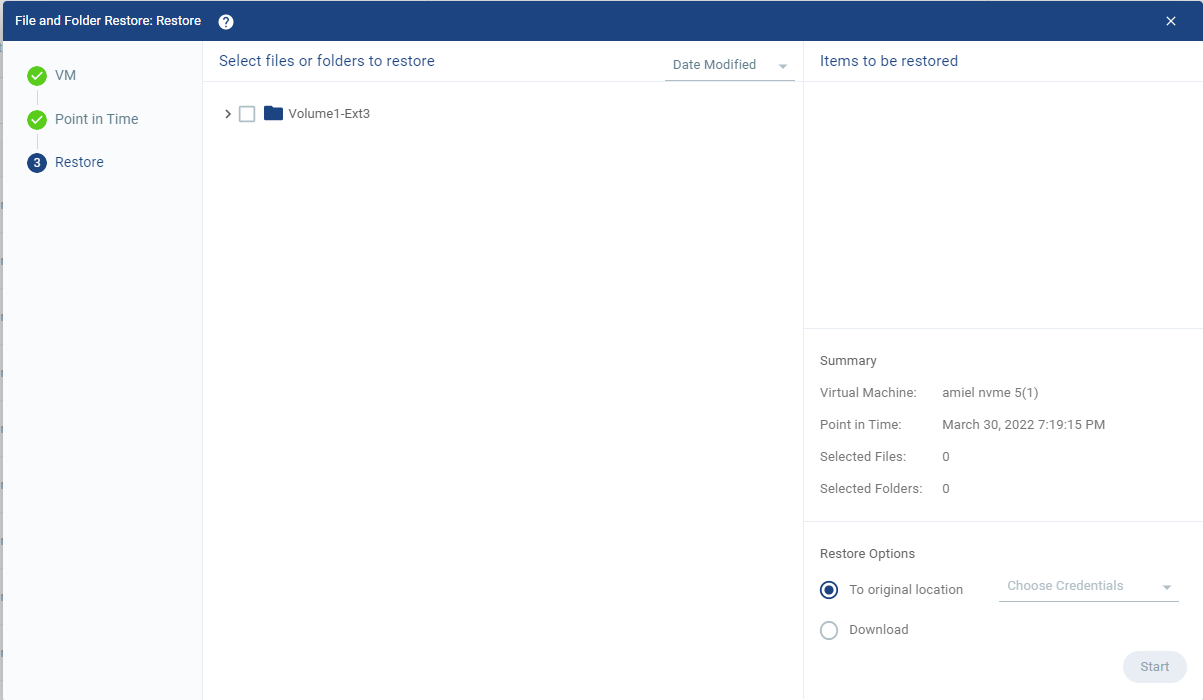
Note: If the mount takes longer than 10 seconds, a note will be shown, with an option to send the task to background. You can browse in the Point in Time from the Monitoring -> Tasks tab, upon mount completion.
|
6.
|
Select the files or folders to restore. |
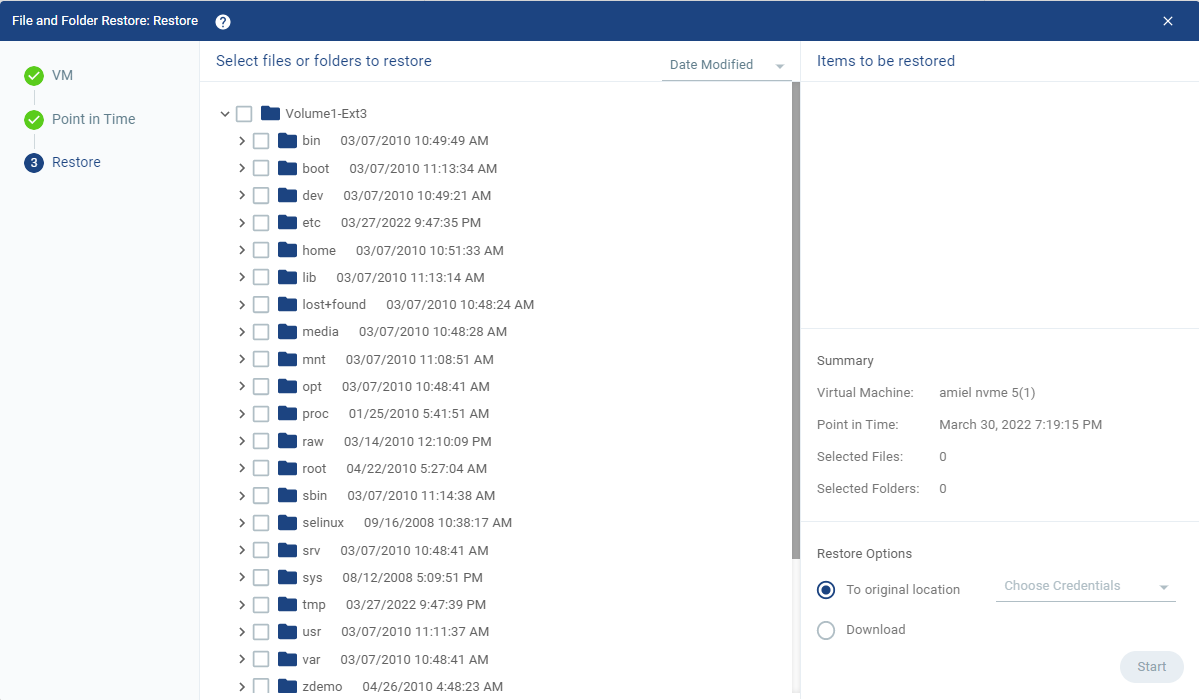
Note: You can deselect these in the right pane, before the operation starts.
|
7.
|
There are two Restore options: |
|
a.
|
To restore the files or folders to their original location, from the To original location area, select the pre-defined credentials which will be used to access the Protected virtual machine, and click Start. |
|
•
|
A new dedicated folder is created for each path to which the file/s are restored. |
|
•
|
The dedicated folder name is Z_Restored <mount checkpoint time>. |
The checkpoint time is in the following format: MMHHYY_HHMMSS. For example, Z_Restored 082820_072614.
|
•
|
If a section of the path to the folder does not exist, it will be created before creating the dedicated folder. |
|
•
|
If the folder already exists, a running number will be added. For example, Z_Restored 082820_ 072614(1) |
|
•
|
The checkpoint time is based on the time zone of the recovery ZVM. |
|
b.
|
To download the files or folders to your local machine, click Download. |
If a selected folder contains unsupported files, only the supported files are included in the download folder.
Note: Saving the files and folders to a network share is dependent on the browser used to display the Zerto user interface and the settings for this browser.
|
•
|
When you select one file to download, and do not compress the file, the name of the downloaded file is the name of the file. For example, if you download a file called Important-file.docx, the name of the file on your computer will be Important-file.docx. |
|
•
|
When you choose one file and choose to compress it, or you select multiple files, the files are zipped into a file called ZertoDownloads.zip. |
|
8.
|
Unmount the Point in Time after the files or folders are restored or downloaded by clicking the unmount icon ( ) next to the virtual machine in the Zerto user interface at Monitoring > Tasks. ) next to the virtual machine in the Zerto user interface at Monitoring > Tasks. |
![]() icon.
icon.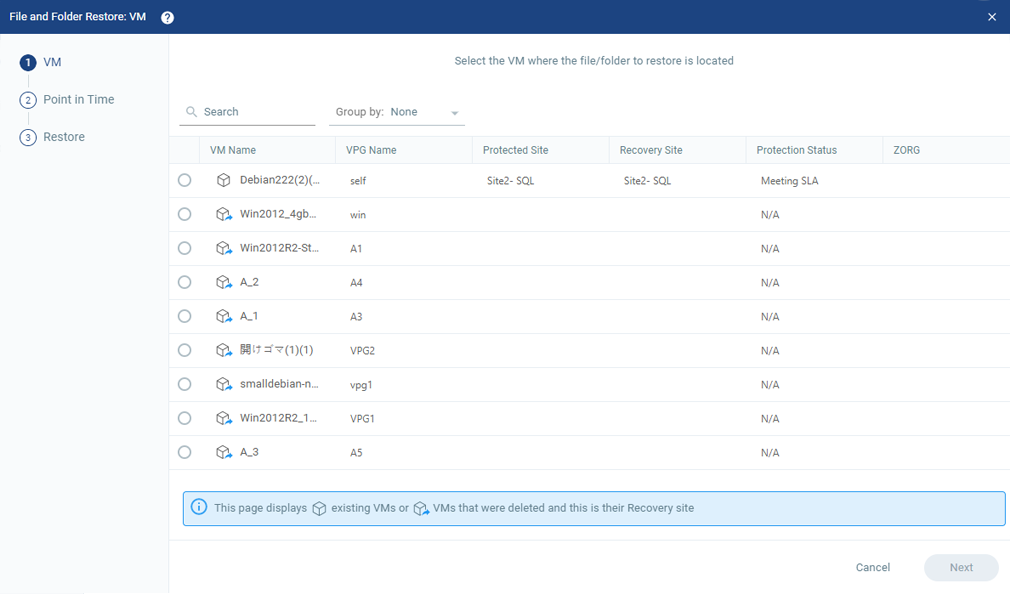


 ) next to the virtual machine in the Zerto user interface at Monitoring > Tasks.